Apache 是当下最流行的 Web 服务器软件之一,有时候也称之为 httpd,是因为 Apache 的守护进程名为 httpd。Docker 安装 apache 的方式有两种
如果你是 Docker 初学者,如果你以后长期使用 httpd ,我们建议你两种方法都试一试,为什么呢?
原因很简单,没有经过优化,你会发现自己使用 Dockerfile 构建的容器都大于官方给的容器,因此,如果你有兴趣,可以研究为啥官方给的镜像总是小于我们自己的镜像
1. docker pull httpd
如果想以最简单的方式安装 Apache, 可以直接使用 docker pull httpd 命令
流程如下
1、 查找DockerHub上的httpd镜像;
    [root@pottercoding.cn ~]# docker search httpd
    NAME    ...    OFFICIAL  ...
    httpd   ...    [OK]      ...
    ...     ...    ...       ...
    ...     ...    ...       ...
列表很多,我们推荐你使用 OFFICIAL = OK 的那一条
2、 拉取官方最新的httpd镜像;
    [root@pottercoding.cn ~]# docker pull httpd
    Using default tag: latest
    ...
3、 稍等片刻,下载完成后就可以在本地镜像列表里看到httpd的镜像了;
    [root@pottercoding.cn apache]# docker images httpd
    REPOSITORY     TAG        IMAGE ID        CREATED           SIZE
    httpd          latest     fb2f3851a971    4 weeks ago       177.5 MB
2. 通过 Dockerfile 文件构建
如果你是运维工程师,我们推荐你使用 Dockerfile 文件构建 httpd 镜像
因为可以加深对安装 apache 的理解
现在,我们一步一步使用 Dockerfile 文件构建 httpd 镜像吧
1、 创建目录apache用于存放后面的相关东西;
    [root@pottercoding.cn ~]#  mkdir -p  ~/apache/www
    [root@pottercoding.cn ~]#  mkdir -p  ~/apache/logs
    [root@pottercoding.cn ~]#  mkdir -p  ~/apache/conf
<table>
 <thead>
  <tr>
   <th align="left">目录</th>
   <th align="left">说明</th>
  </tr>
 </thead>
 <tbody>
  <tr>
   <td align="left">www</td>
   <td align="left">该目录将映射为 apache 容器配置的应用程序目录</td>
  </tr>
  <tr>
   <td align="left">logs</td>
   <td align="left">该目录将映射为 apache 容器的日志目录</td>
  </tr>
  <tr>
   <td align="left">conf</td>
   <td align="left">该目录下的配置文件将映射为apache容器的配置文件</td>
  </tr>
 </tbody>
</table>
2、 进入创建的apache目录,创建文件httpd-foreground文件作为启动apache的脚本文件;
    [root@pottercoding.cn ~]# cd apache
    [root@pottercoding.cn ~]# touch httpd-foreground
然后输入以下内容
    !/bin/sh
    去掉第一行 ! 之间的空格
    set -e
    Apache gets grumpy about PID files pre-existing
    rm -f /usr/local/apache2/logs/httpd.pid
    exec httpd -DFOREGROUND
赋予 httpd-foreground 文件可执行权限
[root@pottercoding.cn ~]# chmod +x httpd-foreground
3、 进入创建的apache目录,创建Dockerfile;
[root@pottercoding.cn apache]# touch Dockerfile
然后输入以下内容
    FROM debian:jessie-backports
    添加组和用户
   RUN groupadd -r www-data && useradd -r --create-home -g www-data www-data
    设置编译环境变量
    ENV HTTPD_PREFIX /usr/local/apache2
    ENV PATH $HTTPD_PREFIX/bin:$PATH
    RUN mkdir -p "$HTTPD_PREFIX" \
        && chown www-data:www-data "$HTTPD_PREFIX"
    WORKDIR $HTTPD_PREFIX
    library for mod_http2
    ENV NGHTTP2_VERSION 1.18.1-1
    ENV OPENSSL_VERSION 1.0.2l-1~bpo8+1
    RUN { \
            echo 'deb http://deb.debian.org/debian stretch main'; \
        } > /etc/apt/sources.list.d/stretch.list \
        && { \
    add a negative "Pin-Priority" so that we never ever get packages from stretch unless we explicitly request them
            echo 'Package: *'; \
            echo 'Pin: release n=stretch'; \
            echo 'Pin-Priority: -10'; \
            echo; \
    except nghttp2, which is the reason we're here
            echo 'Package: libnghttp2*'; \
            echo "Pin: version $NGHTTP2_VERSION"; \
            echo 'Pin-Priority: 990'; \
            echo; \
        } > /etc/apt/preferences.d/unstable-nghttp2
    安装编译依赖
    RUN apt-get update \
        && apt-get install -y --no-install-recommends \
            libapr1 \
            libaprutil1 \
            libaprutil1-ldap \
            libapr1-dev \
            libaprutil1-dev \
            liblua5.2-0 \
            libnghttp2-14=$NGHTTP2_VERSION \
            libpcre++0 \
            libssl1.0.0=$OPENSSL_VERSION \
            libxml2 \
        && rm -r /var/lib/apt/lists/*
    ENV HTTPD_VERSION 2.4.33
    ENV HTTPD_SHA256 de02511859b00d17845b9abdd1f975d5ccb5d0b280c567da5bf2ad4b70846f05
    设置 Apache httpd 镜像地址,我们使用的请清华镜像地址
    ENV APACHE_DIST_URLS http://mirrors.hust.edu.cn/apache/
    安装 apache httpd 编译依赖
    RUN set -eux; \
        \
        mod_http2 mod_lua mod_proxy_html mod_xml2enc
        https://anonscm.debian.org/cgit/pkg-apache/apache2.git/tree/debian/control?id=adb6f181257af28ee67af15fc49d2699a0080d4c
        buildDeps=" \
            bzip2 \
            ca-certificates \
            dpkg-dev \
            gcc \
            liblua5.2-dev \
            libnghttp2-dev=$NGHTTP2_VERSION \
            libpcre++-dev \
            libssl-dev=$OPENSSL_VERSION \
            libxml2-dev \
            zlib1g-dev \
            make \
            wget \
        "; \
        apt-get update; \
        apt-get install -y --no-install-recommends -V $buildDeps; \
        rm -r /var/lib/apt/lists/*; \
        \
        ddist() { \
            local f="$1"; shift; \
            local distFile="$1"; shift; \
            local success=; \
            local distUrl=; \
            if wget -O "$f" "$APACHE_DIST_URLS$distFile" && [ -s "$f" ]; then \
                success=1; \
                break; \
            fi; \
            [ -n "$success" ]; \
        }; \
        \
        ddist 'httpd.tar.bz2' "httpd/httpd-$HTTPD_VERSION.tar.bz2"; \
        \
        mkdir -p src; \
        tar -xf httpd.tar.bz2 -C src --strip-components=1; \
        rm httpd.tar.bz2; \
        cd src; \
        \
        gnuArch="$(dpkg-architecture --query DEB_BUILD_GNU_TYPE)"; \
        ./configure \
            --build="$gnuArch" \
            --prefix="$HTTPD_PREFIX" \
            --enable-mods-shared=reallyall \
            --enable-mpms-shared=all \
        ; \
        make -j "$(nproc)"; \
        make install; \
        \
        cd ..; \
        rm -r src man manual; \
        \
        sed -ri \
            -e 's!^(\s*CustomLog)\s+\S+!\1 /proc/self/fd/1!g' \
            -e 's!^(\s*ErrorLog)\s+\S+!\1 /proc/self/fd/2!g' \
            "$HTTPD_PREFIX/conf/httpd.conf"; \
        \
        apt-get purge -y --auto-remove $buildDeps
    COPY httpd-foreground /usr/local/bin/
    EXPOSE 80
    CMD ["httpd-foreground"]
COPY httpd-foreground /usr/local/bin/ 是将当前目录下的 httpd-foreground 拷贝到镜像里,作为 httpd 服务的启动脚本
相比较于官方给的 [Dockerfile][], 我们更改了以下几点:
1.  去掉镜像自动匹配,而是选择 **清华镜像** ( [http://mirrors.hust.edu.cn/apache/][http_mirrors.hust.edu.cn_apache] )
2.  去掉 GPG 校验
3.  移除了 PATCHES 补丁包
4、 通过Dockerfile文件创建一个httpd镜像mhttpd,名字你可以随意取,一般使用小写字母;
[root@pottercoding.cn apache]# docker build -t mhttpd .
5、 创建完成后,可以在本地的镜像列表里查找到刚刚创建的镜像;
    [root@pottercoding.cn apache]# docker images mhttpd
    REPOSITORY     TAG        IMAGE ID        CREATED           SIZE
    mhttpd         latest     417fa0258ae8    11 days ago       177.5 MB
这次两个镜像竟然出奇的一样大小
运行容器
1、 创建index.html文件;
输入以下命令创建 index.html
vi www/index.html
输入以下内容
    <!DOCTYPE html>
    <meta charset="UTF-8" />
    <h2>Hello pottercoding.cn 程序员波特,程序员编程资料站</h2>
2、 运行容器;
输入以下命令运行容器
docker run -it --name ms-apache-app -p 8080:80 -v "$PWD/www":/usr/local/apache2/htdocs/ httpd:latest
命令说明
1.  -p 80:80
    将容器的 80 端口映射到主机的 8080 端口
2.  -v $PWD/www/:/usr/local/apache2/htdocs/
    将主机中当前目录下的 www 目录挂载到容器的 /usr/local/apache2/htdocs/
如果要以守护进程的方式运行,可以将 -it 改成 -dit
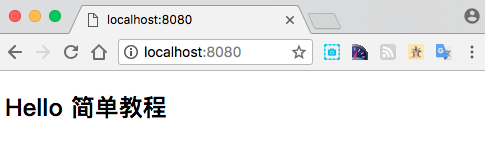
通过浏览器访问 http://localhost:8080/ 可以看到

查看容器启动情况
[root@pottercoding.cn apache]# docker ps
CONTAINER ID        IMAGE               COMMAND              CREATED             STATUS              PORTS                  NAMES
5159c65260e3        httpd:latest        "httpd-foreground"   11 days ago         Up About a minute   0.0.0.0:8080->80/tcp   ms-apache-app
如果添加了 -d 以守护进程的方式运行,那么就要使用
[root@pottercoding.cn apache]# docker ps -a
CONTAINER ID        IMAGE               COMMAND              CREATED             STATUS              PORTS                  NAMES
5159c65260e3        httpd:latest        "httpd-foreground"   11 days ago         Up About a minute   0.0.0.0:8080->80/tcp   ms-apache-app
关闭 ms-apache-app 容器
[root@pottercoding.cn apache]# docker stop ms-apache-app
移除 ms-apache-app 容器
[root@pottercoding.cn apache]# docker rm ms-apache-app