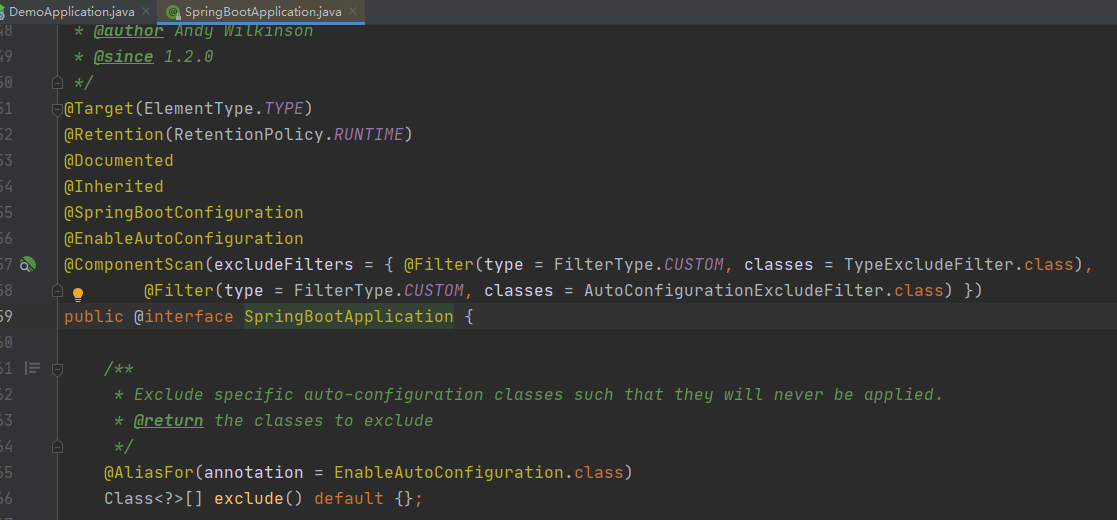
首先对于一个SpringBoot工程来说,最明显的标志的就是
@SpringBootApplication它标记了这是一个SpringBoot工程,所以今天的 SpringBoot自动装配原理也就是从它开始说起。自动装配流程
首先我们来看下@SpringBootApplication 这个注解的背后又有什么玄机呢,我们按下 ctrl + 鼠标左键,轻轻的点一下,此时见证奇迹的时刻..
我们看到如下优雅的代码:
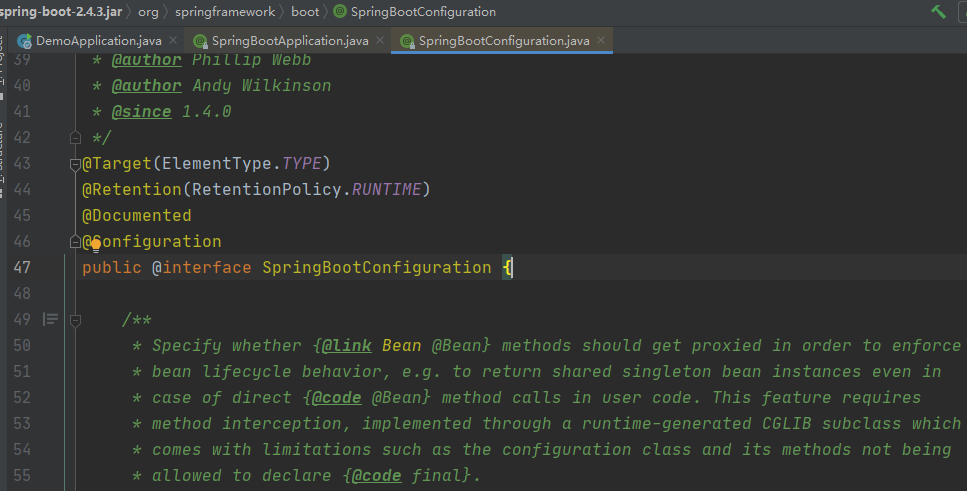
这其中有两个比较容易引起我们注意的地方,一个是@SpringBootConfiguration注解,另一个是@EnableAutoConfiguration注解;之所以说这个两个注解比较吸引我们的眼球, 不是因为它们长大的好看,而是因为其他的注解太难看了(主要是因为其他的注解我们都是比较熟悉,即使不知道他们是干什么的,可以肯定更自动装配是没有关系的)。 然后我们又伸出了邪恶的小手,开启了熟悉的操作,按下了Ctrt + 鼠标左键,瞪着色咪咪的小眼睛,瞳孔放大了百倍等待着奇迹的出现... 擦... 擦...擦...
![]
什么也没有...
那我要你有何用,这么顶级的世界级的开源项目,怎么会让一个没用的家伙存在呢? 于是动用了上亿的脑细胞大军,经过复杂的运算,得出了一个不靠谱的结论:它可能使用来标记这是一个SpringBoot工程的配置。因为SpringBootConfiguration翻译过来就是SpringBoot的配置,于是心中又是几万只羊驼在万马奔腾,大漠飞扬。
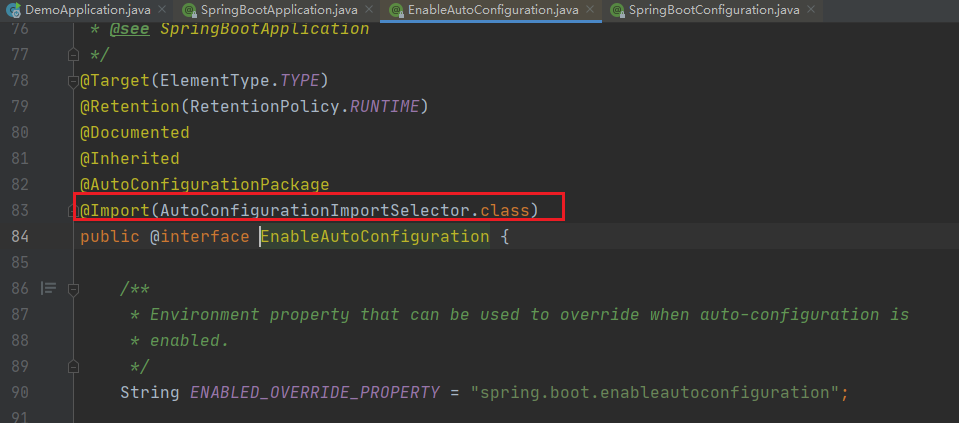
气定神闲之后,秉承着·失败是成功之母"的信念, 熟练的左手行云流水般的按下了 Ctrl + Table 键,回到了最初的的地方。眼睛盯着 @EnableAutoConfiguration ,环顾左右,在地址栏输入了谷歌翻译, 结果显示 自动装配。我找的就是你,真是众里寻他千百度,那人却在灯火阑珊处。 熟练的按下了 Ctrl +左键,迫不及待的想要进入; 心里默默背诵起了《桃花源记》的经典诗句 ∶
林尽水源,便得一山,山有小口,仿佛若有光。便舍船,从口入。初极狭,才通人。复行数十步,豁然开朗
此时此刻心情愉悦,有过前面的经历之后,在面对新的世界时候,我们淡定了许多。 此时大脑高速运转,没有再纠结,直捣黄龙,进入了AutoConfigurationImportSelector.class类,因为谷歌翻译告诉我们,这个是自动配置导入选择器。 于是我们发现了—片新天地public class AutoConfigurationImportSelector implements DeferredImportSelector, BeanClassLoaderAware, ResourceLoaderAware, BeanFactoryAware, EnvironmentAware, Ordered {
@Override
public String[] selectImports(AnnotationMetadata annotationMetadata) {
    if (!isEnabled(annotationMetadata)) {
        return NO_IMPORTS;
    }
            // 获取自动配置的实体
    AutoConfigurationEntry autoConfigurationEntry = getAutoConfigurationEntry(annotationMetadata);
    return StringUtils.toStringArray(autoConfigurationEntry.getConfigurations());
}

    // 具体用来加载自动配置类得方法
protected AutoConfigurationEntry getAutoConfigurationEntry(AnnotationMetadata annotationMetadata) {
    if (!isEnabled(annotationMetadata)) {
        return EMPTY_ENTRY;
    }
    AnnotationAttributes attributes = getAttributes(annotationMetadata);
            // 获取候选的配置类,即使后宫佳丽三千,也是要筛选的
    List<String> configurations = getCandidateConfigurations(annotationMetadata, attributes);
            // 根据情况,自动配置需要的配置类和不需要的配置了
    configurations = removeDuplicates(configurations);
    Set<String> exclusions = getExclusions(annotationMetadata, attributes);
    checkExcludedClasses(configurations, );
    configurations.removeAll(exclusions);
    configurations = getConfigurationClassFilter().filter(configurations);
    fireAutoConfigurationImportEvents(configurations, exclusions);
            // 返回最终需要的配置
    return new AutoConfigurationEntry(configurations, exclusions);
}
}
而这个自动配置的实体 AutoConfigurationEntry 里面有两个属性,configurations和 exclusions。protected static class AutoConfigurationEntry {
// 用来存储需要的配置项
private final List<String> configurations;
// 用来存储排除的配置项
private final Set<String> exclusions;
private AutoConfigurationEntry() {
this.configurations = Collections.emptyList();
this.exclusions = Collections.emptySet();
}
}在后面可以看到 getAutoConfigurationEntry()方法返回了一个对象 return new AutoConfigurationEntry(configurations, exclusions);这里也就是把我们需要的配置都拿到了。
那他是怎么拿到的候选的配置类呢? 我们接着看这个获取候选配置类的方法 List<String> configurations = getCandidateConfigurations(annotationMetadata, attributes);
进到方法后我们看到下面这个方法具体获取候选配置类的方法内容

这里我们跟着断点去走,首先进入getSpringFactoriesLoaderFactoryClass()方法protected Class<?> getSpringFactoriesLoaderFactoryClass() {
// 返回的是EnableAutoConfiguration字节码对象
return EnableAutoConfiguration.class;
}接着我们在进入getBeanClassLoader()方法,这里就是一个类加载器protected ClassLoader getBeanClassLoader() {
return this.beanClassLoader;
}
最后我们在进入loadFactoryNames()方法,这个方法就是根据刚才的字节码文件和类加载器来找到候选的配置类。传递过来的字节码public static List<String> loadFactoryNames(Class<?> factoryType, @Nullable ClassLoader classLoader) {
ClassLoader classLoaderToUse = classLoader;
if (classLoaderToUse == null) {
classLoaderToUse = SpringFactoriesLoader.class.getClassLoader();
}
// 获取的EnableAutoConfiguration.class的权限定名
//org.springframework.boot.autoconfigure.EnableAutoConfiguration
String factoryTypeName = factoryType.getName();
return loadSpringFactories(classLoaderToUse).getOrDefault(factoryTypeName, Collections.emptyList());
}如下图:
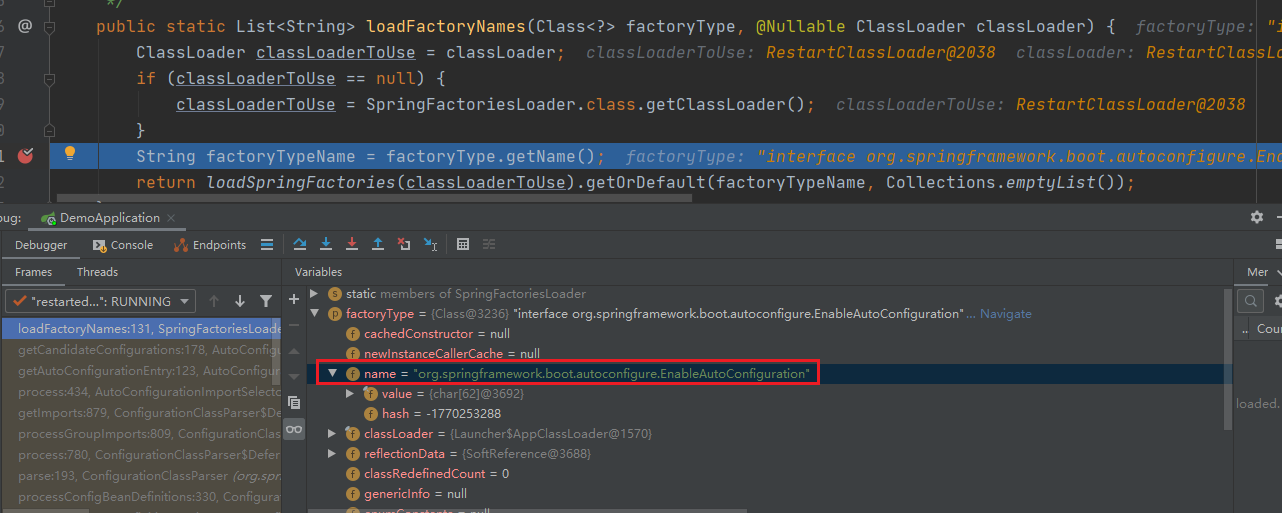
最后通过loadSpringFactories()来获取到所有的配置类private static Map<String, List<String>> loadSpringFactories(ClassLoader classLoader) {
// 缓存加载的配置类
Map<String, List<String>> result = cache.get(classLoader);
if (result != null) {
return result;
}
result = new HashMap<>();
try {
// 去资源目录下找
Enumeration<URL> urls = classLoader.getResources(FACTORIES_RESOURCE_LOCATION);
while (urls.hasMoreElements()) {
URL url = urls.nextElement();
UrlResource resource = new UrlResource(url);
Properties properties = PropertiesLoaderUtils.loadProperties(resource);
for (Map.Entry<?, ?> entry : properties.entrySet()) {
String factoryTypeName = ((String) entry.getKey()).trim();
String[] factoryImplementationNames =
StringUtils.commaDelimitedListToStringArray((String) entry.getValue());
for (String factoryImplementationName : factoryImplementationNames) {
result.computeIfAbsent(factoryTypeName, key -> new ArrayList<>())
.add(factoryImplementationName.trim());
}
}
}
// Replace all lists with unmodifiable lists containing unique elements
result.replaceAll((factoryType, implementations) -> implementations.stream().distinct()
.collect(Collectors.collectingAndThen(Collectors.toList(), Collections::unmodifiableList)));
// 加载完成放到缓存中
cache.put(classLoader, result);
}
catch (IOException ex) {
throw new IllegalArgumentException("Unable to load factories from location [" +
FACTORIES_RESOURCE_LOCATION + "]", ex);
}
// 返回加载到的配置类
return result;
}
这里我们要看下怎么从资源目录下 FACTORIES_RESOURCE_LOCATION 加载的。下面是加载配置文件的路径:
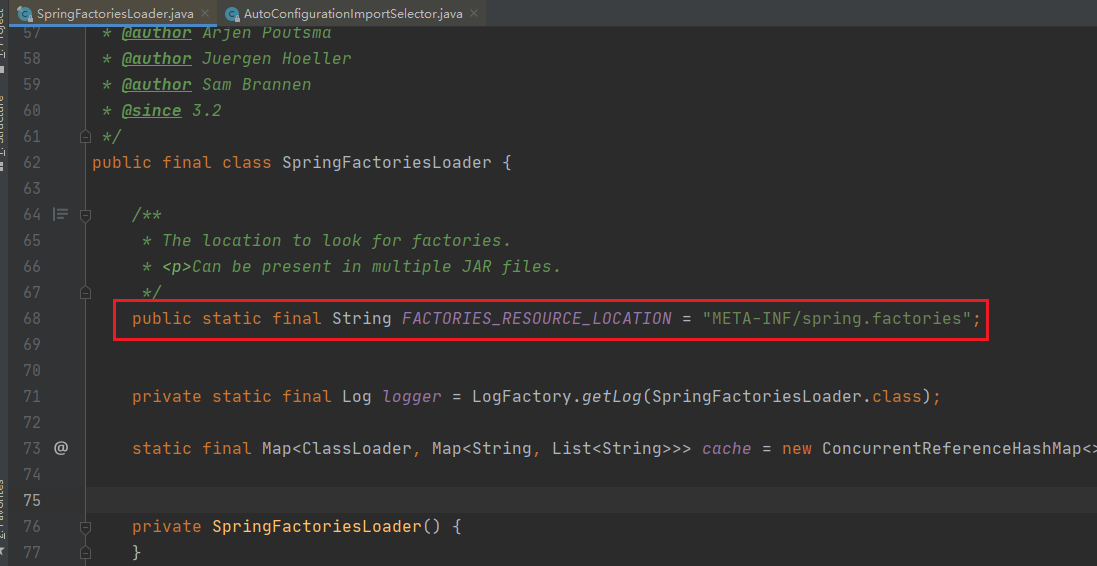
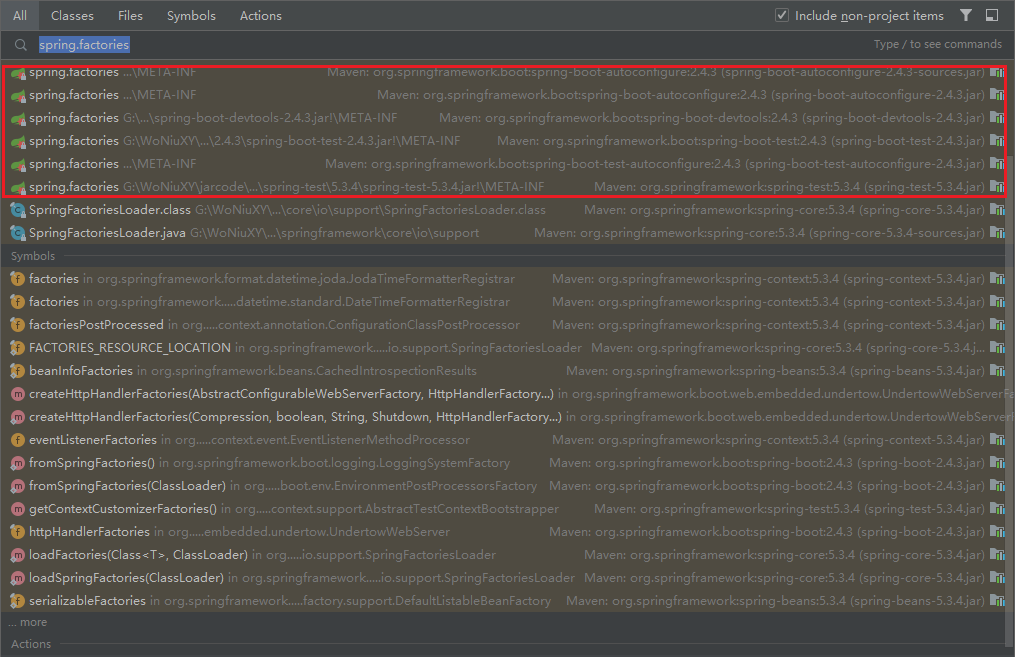
也就是项目启动的时候会去加载所有 META-INF 下的所有的 spring.factories 文件,我们搜一下这个这个文件,我搭建的是一个很简单的 SpringBoot 工程,它会去这几个 jar 里面找相关的配置类
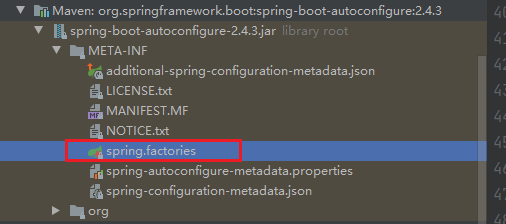
但是最后自动装配的类是这个spring-boot-autoconfigure-2.4.3.RELEASE.jar
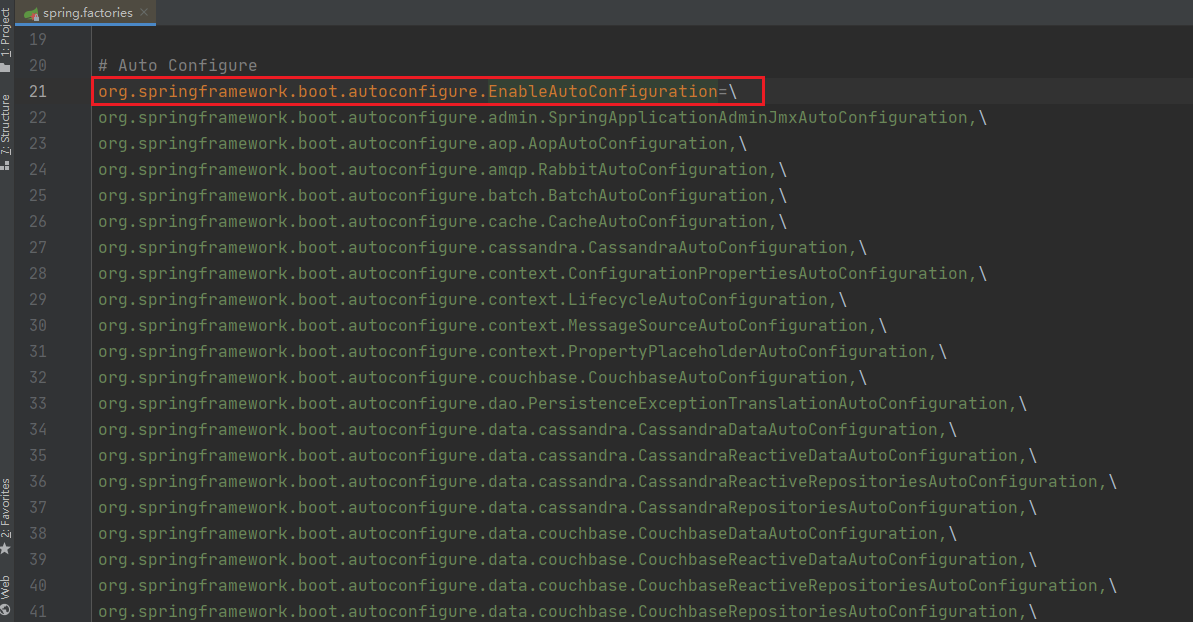
而根据EnabLeAutoConfiguration.class字节码加载的配置类就只有这118自动配置类
## 小结
实际上SpringBoot的自动装配原理,其实就是在项目启动的时候去加载META-INF下的 spring.factories 文件,好像也没有那么高大上。当然在启动的过程中还会有其他的配置项的加载,这里咱么直说了自动装配的加载过程。希望对大家可以有所启发。
问题∶ 明白了SpringBoot的自动装配原理, 如果我们需要让项目启动的时候就加载我们自定义的配置类, 该如何写呢?