前言
在上一个章节中,一一哥 带大家实现了**如何在Spring Security中添加执行自定义的过滤器,进而实现验证码校验功能。**这种实现方式,只是实现验证码功能的方式之一,接下来我们再学习另一种实现方式,就是利用AuthenticationProvider来实现验证码功能,通过这个案例,我们学习如何进行自定义AuthenticationProvider。
一. 认证提供器简介
在上一章节中,我带各位利用自定义的过滤器实现了图形验证码效果,接下来我们利用另一种方式,基于自定义的认证提供器来实现图形验证码。
1. 认证提供器AuthenticationProvider
在第11章节中,壹哥 给大家讲过Spring Security的认证授权实现流程,其中就给大家讲解过AuthenticationProvider的作用,接下来我们看一下AuthenticationProvider接口的类关系图:
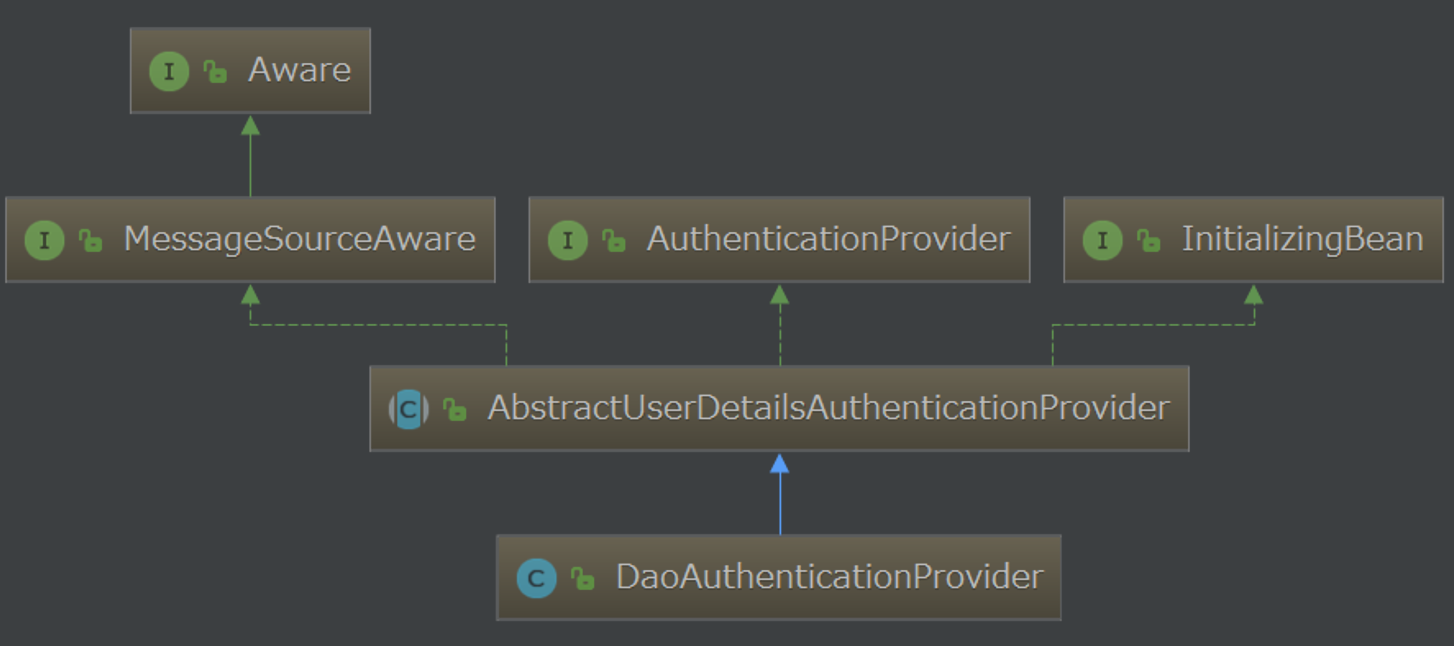
从上图中可知,AuthenticationProvider是一个接口,该接口有一个直接的子类AbstractUserDetailsAuthenticationProvider,该类有2个抽象的方法:additionalAuthenticationChecks() 和 retrieveUser(),如下图:


我们可以通过编写一个子类继承AbstractUserDetailsAuthenticationProvider,复写这2个抽象方法,进行满足自己需求的扩展实现。Spring Security中的DaoAuthenticationProvider子类就是通过复写这2个抽象方法,实现了基于数据库模型的认证授权。
我们今天会通过继承DaoAuthenticationProvider,来实现图形验证码的校验功能。
2. WebAuthenticationDetails类介绍
了解完上面的AuthenticationProvider类之后,我们还需要了解另一个类WebAuthenticationDetails。
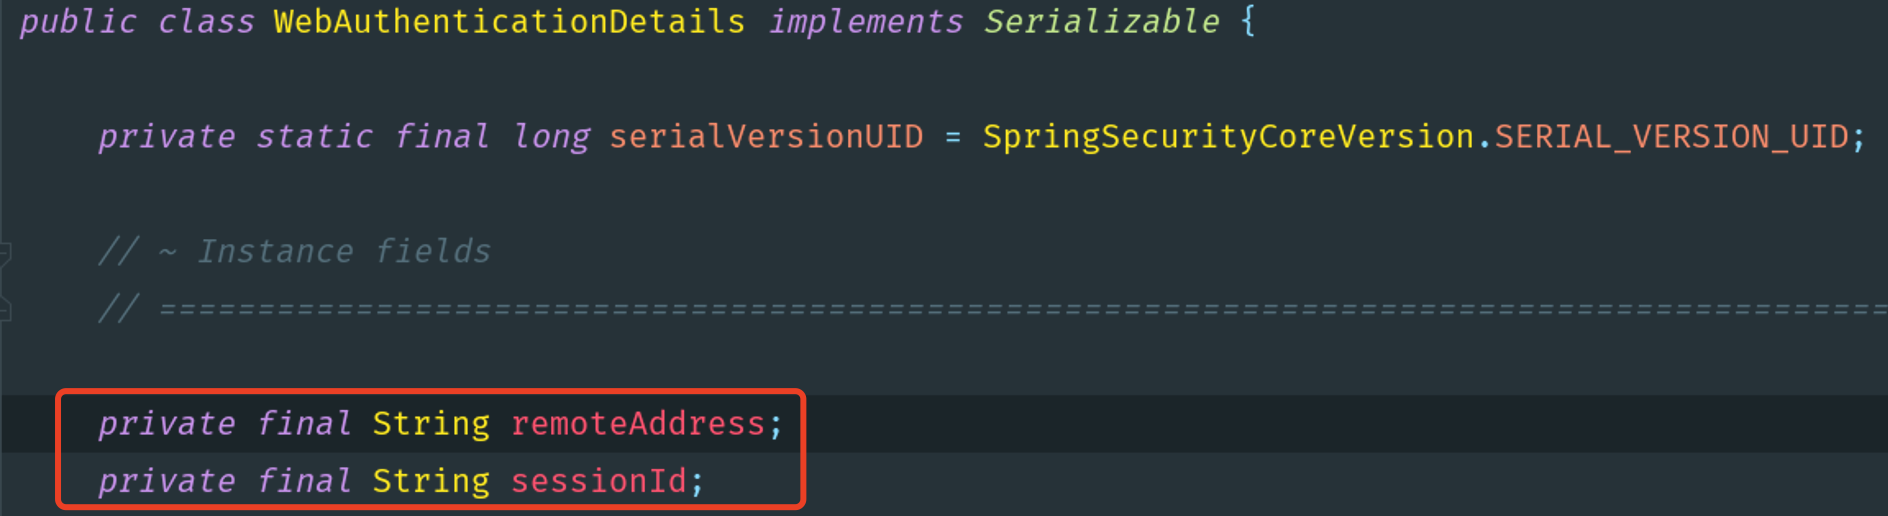
我们知道在Spring Security中有一个UsernamePasswordAuthenticationToken类,封装了用户的principal、credentials信息,该类还从它的父类AbstractAuthenticationToken中继承了details信息。其中这个details信息表示认证用户的额外信息,比如请求用户的remoteAddress和sessionId等信息,这两个信息都是在另一个WebAuthenticationDetails类中定义的,所以我们可以利用WebAuthenticationDetails来封装用户的额外信息。
了解完上面的这些必要的API,我们就可以实现今天的需求了。
二. 实现图形验证码
1. 添加依赖包
我们还是和之前的案例一样,可以先创建一个新的module,创建过程略。
在本案例中我们依然采用github上的开源验证码解决方案kaptcha,所以需要在原有项目的基础上添加kaptcha的依赖包。
<dependencies>
        <dependency>
            <groupId>org.springframework.boot</groupId>
            <artifactId>spring-boot-starter-web</artifactId>
        </dependency>

        <dependency>
            <groupId>org.springframework.boot</groupId>
            <artifactId>spring-boot-starter-security</artifactId>
        </dependency>

        <dependency>
            <groupId>org.mybatis.spring.boot</groupId>
            <artifactId>mybatis-spring-boot-starter</artifactId>
            <version>1.3.1</version>
        </dependency>

        <dependency>
            <groupId>mysql</groupId>
            <artifactId>mysql-connector-java</artifactId>
            <scope>runtime</scope>
        </dependency>

        <dependency>
            <groupId>com.github.penggle</groupId>
            <artifactId>kaptcha</artifactId>
            <version>2.3.2</version>
        </dependency>

        <dependency>
            <groupId>org.springframework.security</groupId>
            <artifactId>spring-security-test</artifactId>
            <scope>test</scope>
        </dependency>
    </dependencies>
2. 创建Producer对象
跟上一个案例一样,创建CaptchaConfig配置类,在该类中创建一个Producer对象,对验证码对象进行必要的配置。
@Configuration
public class CaptchaConfig {

    @Bean
    public Producer captcha() {
        // 配置图形验证码的基本参数
        Properties properties = new Properties();
        // 图片宽度
        properties.setProperty("kaptcha.image.width", "150");
        // 图片长度
        properties.setProperty("kaptcha.image.height", "50");
        // 字符集
        properties.setProperty("kaptcha.textproducer.char.string", "0123456789");
        // 字符长度
        properties.setProperty("kaptcha.textproducer.char.length", "4");
        Config config = new Config(properties);
        // 使用默认的图形验证码实现,当然也可以自定义实现
        DefaultKaptcha defaultKaptcha = new DefaultKaptcha();
        defaultKaptcha.setConfig(config);
        return defaultKaptcha;
    }

}
3. 创建生成验证码的接口
在上面创建了Producer对象后,接着创建一个生成验证码的接口,该接口中负责生成验证码图片,并将验证码存储到session中。
@Controller
public class CaptchaController {

    @Autowired
    private Producer captchaProducer;

    @GetMapping("/captcha.jpg")
    public void getCaptcha(HttpServletRequest request, HttpServletResponse response) throws IOException {
        // 设置内容类型
        response.setContentType("image/jpeg");
        // 创建验证码文本
        String capText = captchaProducer.createText();

        // 将验证码文本设置到session
        request.getSession().setAttribute("captcha", capText);

        // 创建验证码图片
        BufferedImage bi = captchaProducer.createImage(capText);
        // 获取响应输出流
        ServletOutputStream out = response.getOutputStream();
        // 将图片验证码数据写到响应输出流
        ImageIO.write(bi, "jpg", out);

        // 推送并关闭响应输出流
        try {
            out.flush();
        } finally {
            out.close();
        }
    }

}
4. 自定义异常
接下来自定义一个运行时异常,用于处理验证码校验失败时抛出异常提示信息。
public class VerificationCodeException extends AuthenticationException {

    public VerificationCodeException() {
        super("图形验证码校验失败");
    }

}
5. 自定义WebAuthenticationDetails
我在上面给大家介绍过WebAuthenticationDetails这个类,知道该类中可以封装用户的额外信息,所以在这里我们自定义一个WebAuthenticationDetails类,封装验证码信息,并把用户传递过来的验证码与session中保存的验证码进行对比。
/**
 * 添加额外的用户认证信息
 */
public class MyWebAuthenticationDetails extends WebAuthenticationDetails {

    private String imageCode;

    private String savedImageCode;

    public String getImageCode() {
        return imageCode;
    }

    public String getSavedImageCode() {
        return savedImageCode;
    }

    /**
     * 补充用户提交的验证码和session保存的验证码
     */
    public MyWebAuthenticationDetails(HttpServletRequest request) {
        super(request);
        this.imageCode = request.getParameter("captcha");
        //获取session对象
        HttpSession session = request.getSession();

        this.savedImageCode = (String) session.getAttribute("captcha");
        if (!StringUtils.isEmpty(this.savedImageCode)) {
            // 随手清除验证码,不管是失败还是成功,所以客户端应在登录失败时刷新验证码
            session.removeAttribute("captcha");
        }
    }

}
6. 自定义AuthenticationDetailsSource
***AuthenticationDetailsSource是一个接口,该接口带有一个buildDetails方法,该方法会在创建一个新的authentication的details对象时被调用,而且可以在这里传递给details对象一个request参数,***如下图所示:
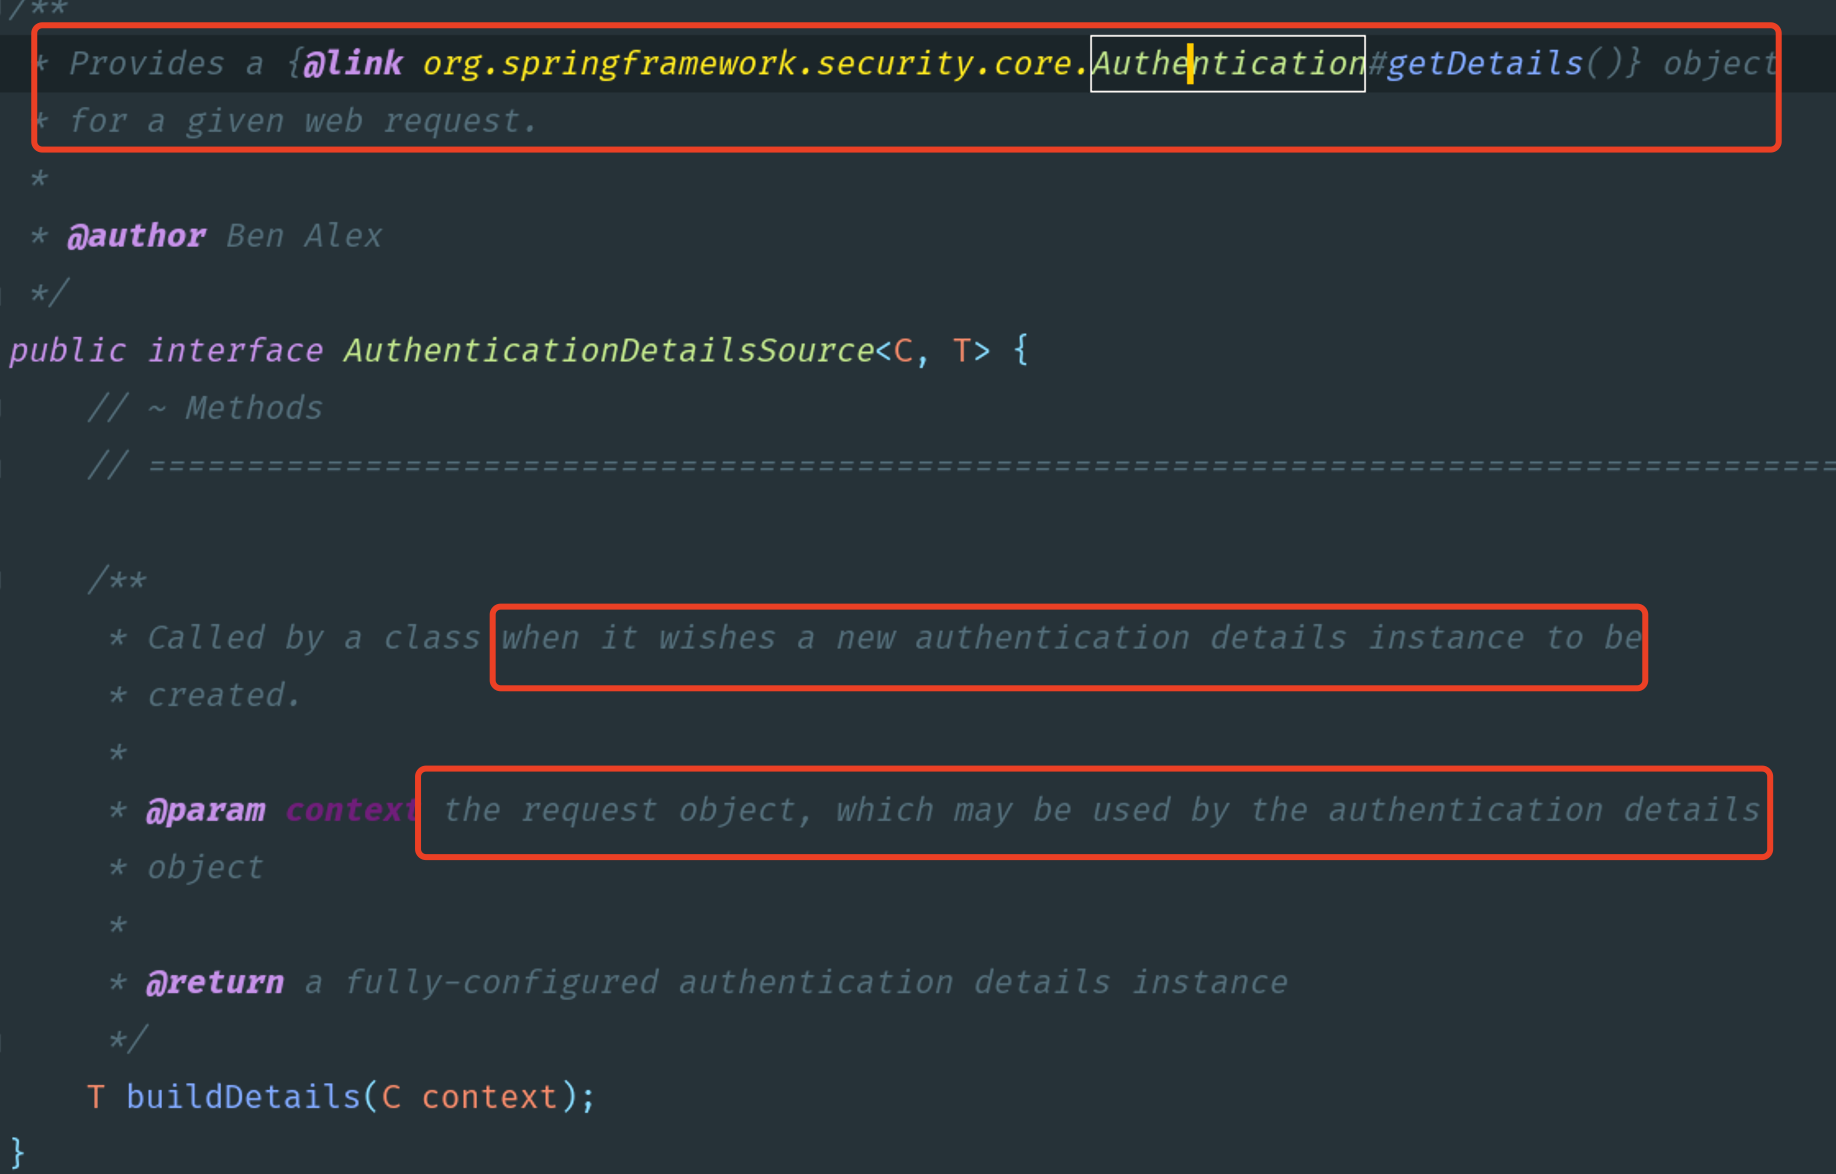
所以这里我们定义一个AuthenticationDetailsSource类,通过该类构建出上面定义的WebAuthenticationDetails对象,并且给WebAuthenticationDetails传递进去HttpServletRequest对象。
@Component
public class MyWebAuthenticationDetailsSource implements AuthenticationDetailsSource<HttpServletRequest,WebAuthenticationDetails> {

    /**
     * 创建一个WebAuthenticationDetails对象
     */
    @Override
    public WebAuthenticationDetails buildDetails(HttpServletRequest request) {

        return new MyWebAuthenticationDetails(request);
    }

}
7. 自定义DaoAuthenticationProvider
接下来通过继承DaoAuthenticationProvider父类,来引入对图形验证码的验证操作。
/**
 * 在常规的数据库认证之上,添加图形验证码功能
 */
@Component
public class MyAuthenticationProvider extends DaoAuthenticationProvider {

    /**
     * 构造方法注入UserDetailService和PasswordEncoder
     */
    public MyAuthenticationProvider(UserDetailsService userDetailsService, PasswordEncoder passwordEncoder) {
        this.setUserDetailsService(userDetailsService);
        this.setPasswordEncoder(passwordEncoder);
    }

    /**
     * 在常规的认证之上,添加额外的图形验证码功能
     */
    @Override
    protected void additionalAuthenticationChecks(UserDetails userDetails, UsernamePasswordAuthenticationToken usernamePasswordAuthenticationToken) throws AuthenticationException {
        //获取token令牌中关联的details对象,并将其转换为我们自定义的MyWebAuthenticationDetails
        MyWebAuthenticationDetails details = (MyWebAuthenticationDetails) usernamePasswordAuthenticationToken.getDetails();
        String imageCode = details.getImageCode();
        String savedImageCode = details.getSavedImageCode();

        // 检验图形验证码
        if (StringUtils.isEmpty(imageCode) || StringUtils.isEmpty(savedImageCode) || !imageCode.equals(savedImageCode)) {
            throw new VerificationCodeException();
        }

        //在正常的认证检查之前,添加额外的关于图形验证码的校验
        super.additionalAuthenticationChecks(userDetails, usernamePasswordAuthenticationToken);
    }

}
8. 添加SecurityConfig
然后创建编写SecurityConfig类,关联配置我们前面编写的AuthenticationDetailsSource和AuthenticationProvider类。
@SuppressWarnings("all")
@EnableWebSecurity(debug = true)
public class SecurityConfig extends WebSecurityConfigurerAdapter {

    @Autowired
    private AuthenticationDetailsSource<HttpServletRequest, WebAuthenticationDetails> myWebAuthenticationDetailsSource;

    @Autowired
    private AuthenticationProvider authenticationProvider;

    @Override
    protected void configure(HttpSecurity http) throws Exception {
        http.authorizeRequests()
                .antMatchers("/admin/api/**")
                .hasRole("ADMIN")
                .antMatchers("/user/api/**")
                .hasRole("USER")
                .antMatchers("/app/api/**", "/captcha.jpg")
                .permitAll()
                .anyRequest()
                .authenticated()
                .and()
                .formLogin()
            	//这里关联配置自定义的AuthenticationDetailsSource
                .authenticationDetailsSource(myWebAuthenticationDetailsSource)
                .failureHandler(new SecurityAuthenticationFailureHandler())
                .successHandler(new SecurityAuthenticationSuccessHandler())
                .loginPage("/myLogin.html")
                .loginProcessingUrl("/login")
                .permitAll()
                .and()
                .csrf()
                .disable();
    }

    //在这里关联我们自定义的AuthenticationProvider
    @Override
    protected void configure(AuthenticationManagerBuilder auth) throws Exception {
        auth.authenticationProvider(authenticationProvider);
    }

    @Bean
    public PasswordEncoder passwordEncoder() {

        return NoOpPasswordEncoder.getInstance();
    }

}
9. 编写测试页面
最后编写一个自定义的登录页面,在这里添加对验证码接口的引用,我这里列出html的核心代码。
<body>
        <div class="login">
            <h2>Access Form</h2>
            <div class="login-top">
                <h1>登录验证</h1>
                <form action="/login" method="post">
                    <input type="text" name="username" placeholder="username" />
                    <input type="password" name="password" placeholder="password" />
                    <div style="display: flex;">
                        <!-- 新增图形验证码的输入框 -->
                        <input type="text" name="captcha" placeholder="captcha" />
                        <!-- 图片指向图形验证码API -->
                        <img src="/captcha.jpg" alt="captcha" height="50px" width="150px" style="margin-left: 20px;">
                    </div>
                    <div class="forgot">
                        <a href="#">忘记密码</a>
                        <input type="submit" value="登录" >
                    </div>
                </form>
            </div>
            <div class="login-bottom">
                <h3>新用户 <a href="#">注 册</a></h3>
            </div>
        </div>
    </body>
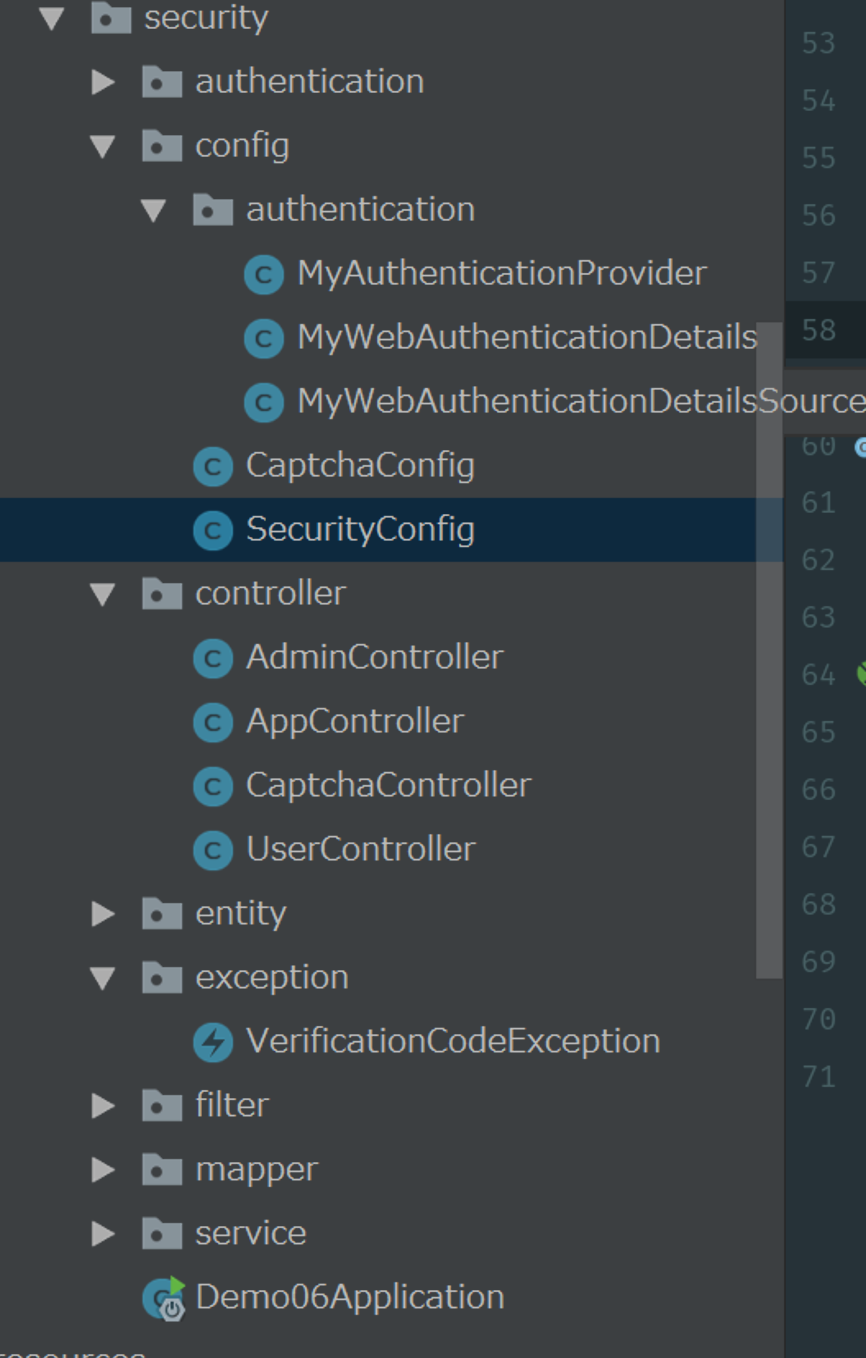
10. 代码结构
本案例的主要代码结构如下图所示,各位可以参考创建。
11. 启动项目测试
接下来我们启动项目,跳转到登录页面后,我们就可以看到验证码已经被创建出来了。
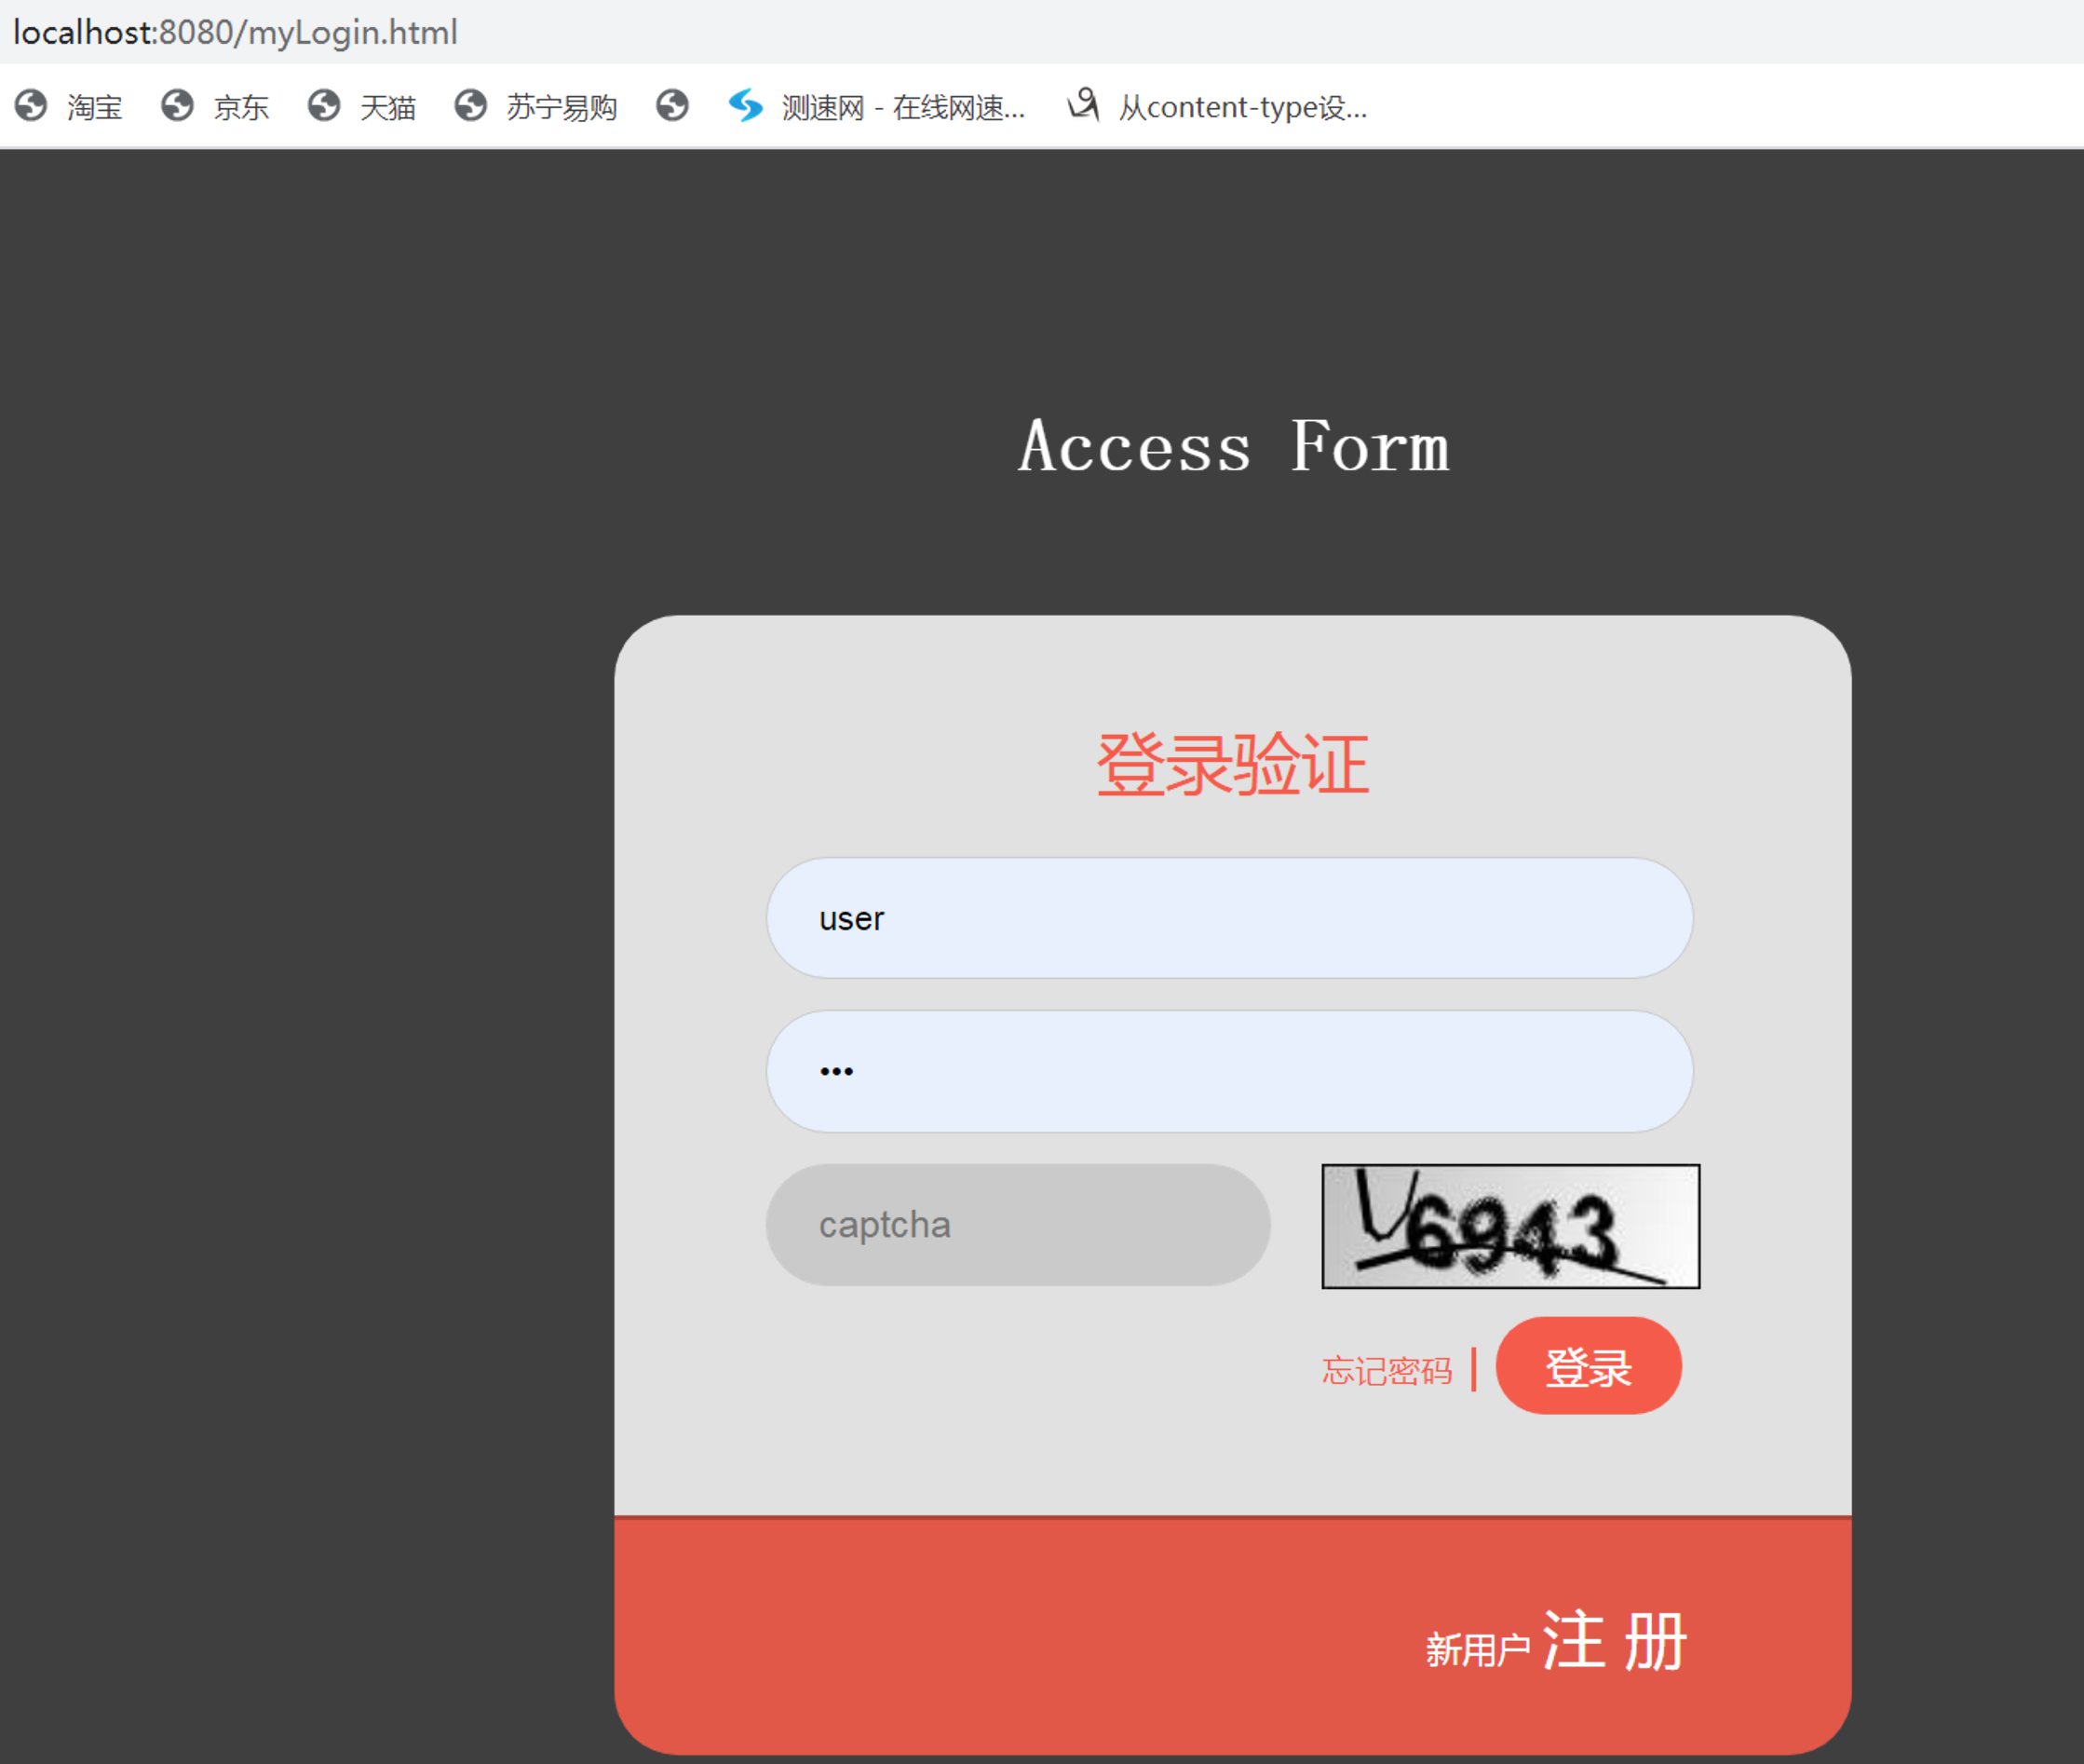
此时我们可以看到生成的数字验证码,在我们输入正确的用户名、密码、验证码后,就可以成功的登录进去访问web接口了。
至此,我们就实现了基于自定义的认证提供器来实现图形验证码功能了,这种实现方式要比第一种实现方式更复杂一些,其实都能满足我们的开发需求。有的小伙伴会问,开发时到底选择哪一种方式呢?壹哥觉得都无所谓的!你有什么更好的见解吗?可以在评论区留言哦!
版权声明:本文不是「本站」原创文章,版权归原作者所有 | 原文地址: